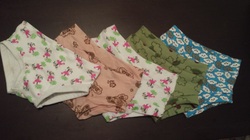
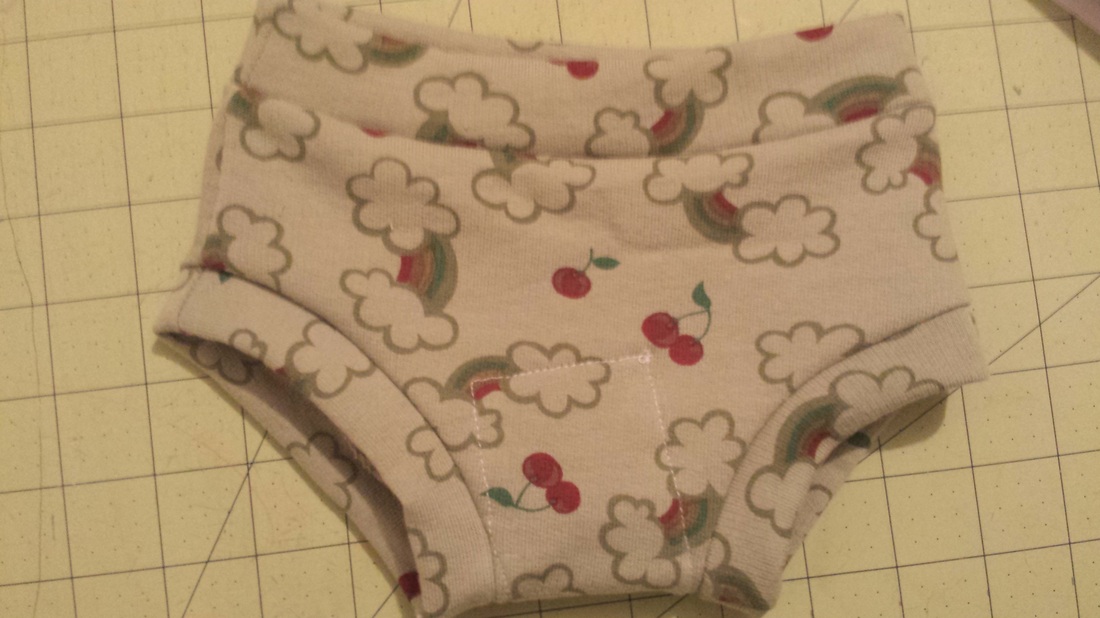
 Aptly named after my little girl, the Super Girl Undies are perfect for early potty trainers. My girl doesn't turn 2 until the end of next month and is getting pretty thinned out as she grows taller. We didn't expect her to potty train so quickly, and I was totally unprepared. For the first day, she had to borrow her brother's underwear! They are a trim fit, thin and easy to take off and slip on. The best part is that they take only about 15-20 minutes to make, including cutting and assembly, and do not require elastic, hemming or bias tape. To start, you will need a cute knit fabric. The cuter, the better! You can use any type of cotton knit, interlock, jersey or even thermal. Anything that has a very good stretch will work, but if this is for underwear, you will want to stick with cotton and natural fibers. Of course, you could use this pattern for swim bottoms and use a nylon swimsuit material! Materials:
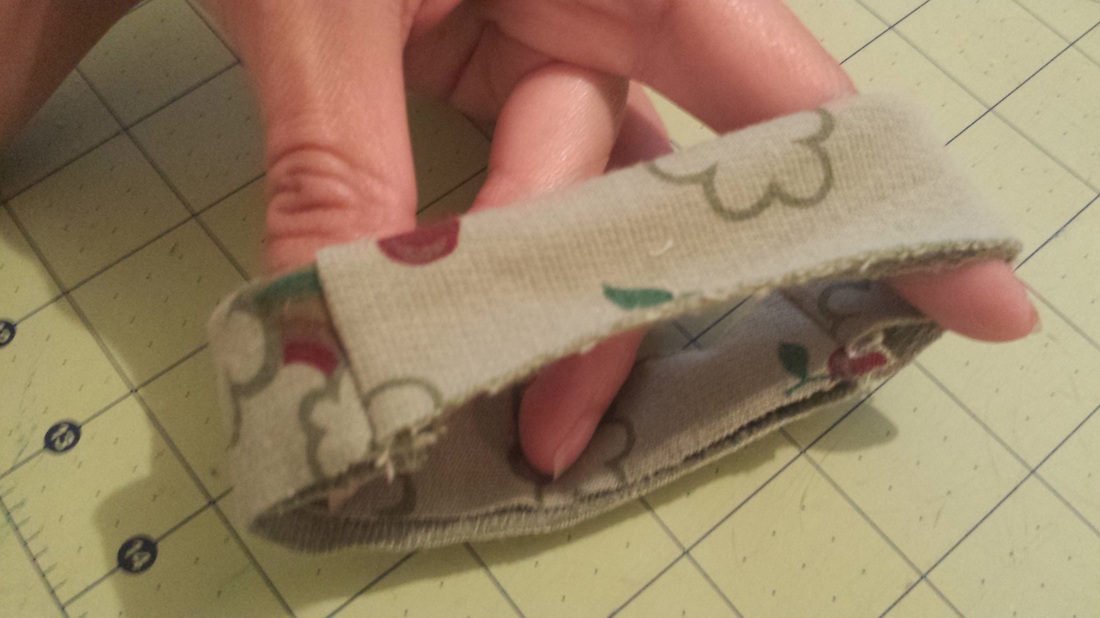
Instructions: Print out your pattern. Make sure that your printer settings are adjusted to print the page out as "Actual Fit". Cut out the two pieces. Fold your fabric in half and lay the pattern pieces on the fabric as directed. You will notice that the pattern piece will tell you which direction the stretch needs to go. This is very important, because if you cut it the wrong way, your undies will not stretch over your child's hips. Cut on the fold, one of each. Next, you will need to cut the leg bands and the waistband. The leg bands will be small strips measuring 5" long by 2" wide. Cut four of these with the stretch running lengthwise across the strip. For the waistband, you can either cut one long 15" x 3" piece, or two 7.5" x 3" pieces that you would sew together to make one long piece. If you are using less than 1/4 yard of knit and using up scraps, this is a good way to fit your waistband. Make sure that the stretch is lengthwise across the strip, maximizing the stretch. You will have the following pieces: 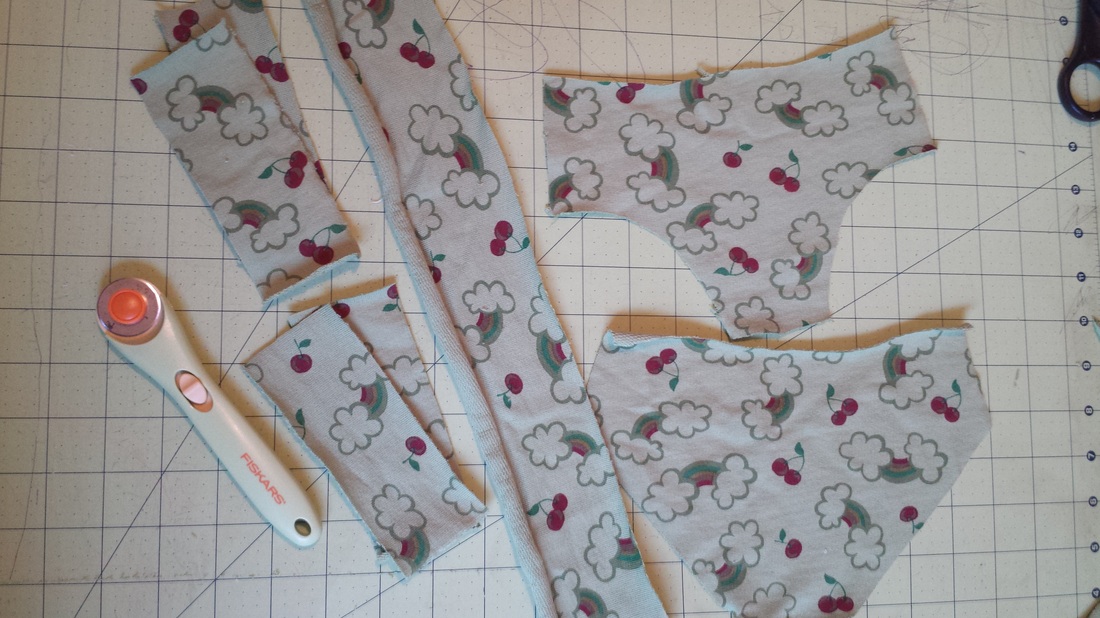 Next, sew the front and rear panel together by placing the right sides together and sewing along both sides and the bottom. When sewing with knit fabrics, I like to use my serger, but for these, I just used my regular Singer sewing machine. To avoid puckering, adjust your settings to a longer stitch length and loose tension. 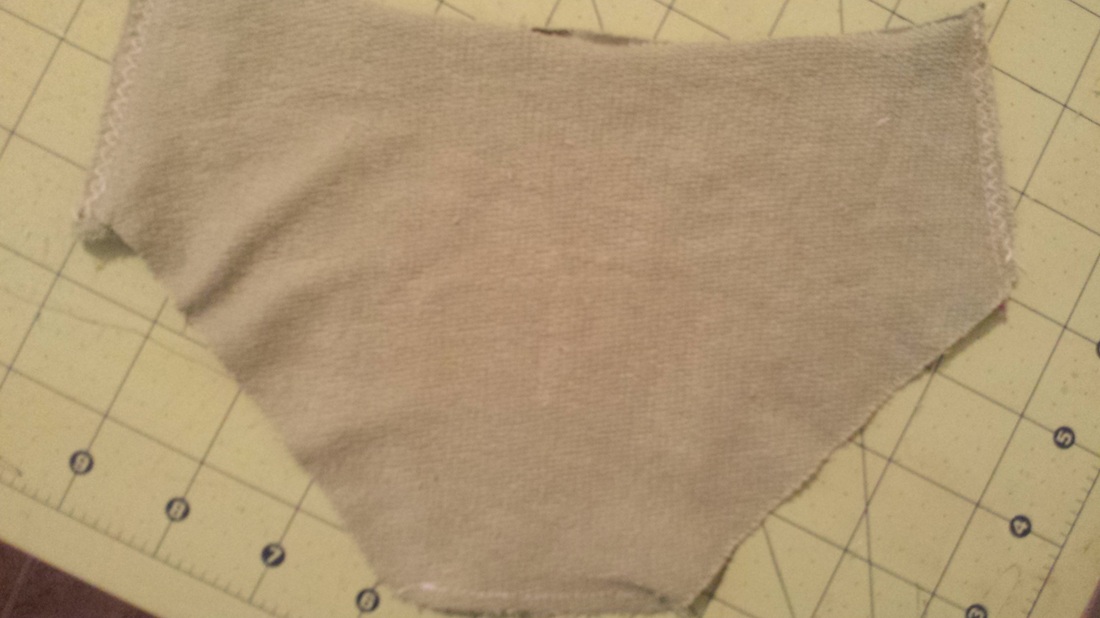 You can turn it right side out and set it aside, or you could choose to sew some extra padding/soaker panels into the crotch area. To do this, I cut two more 5"x2" pieces (stretch is not as important for this step, so use some scraps, or choose a more absorbent material if you are using these as trainers). Pin them to the inside and sew down. I was not paying much attention and accidentally pinned them down crooked, so you might want to take more more and straighten it. Oops! 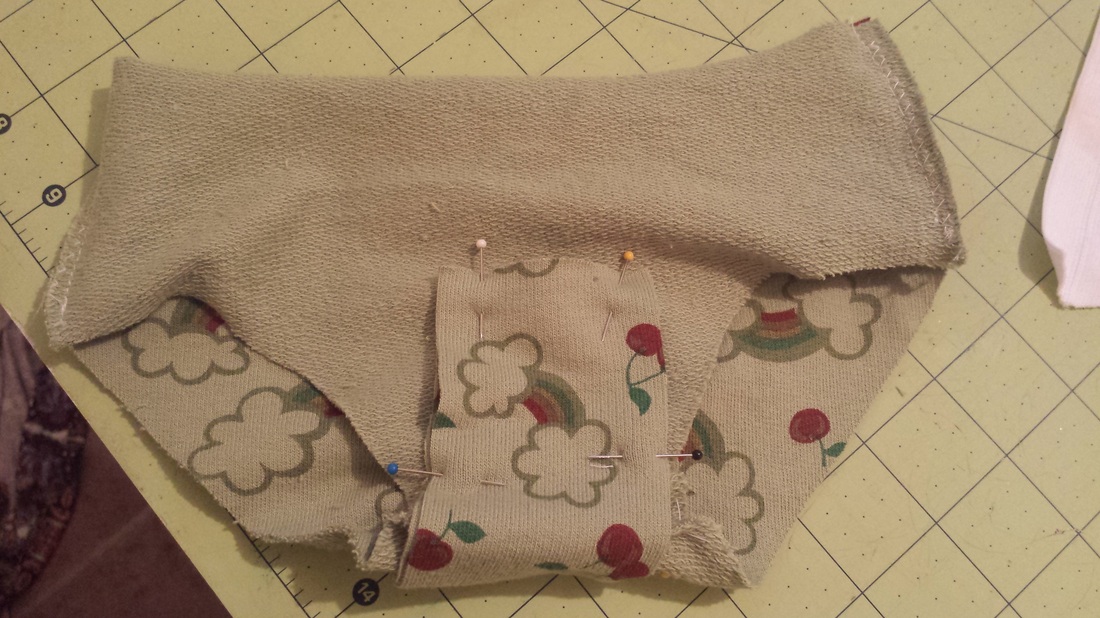 Now you will take two of your leg band pieces and. with right sides together, sew both ends closed. Turn it inside out and repeat with the other leg band
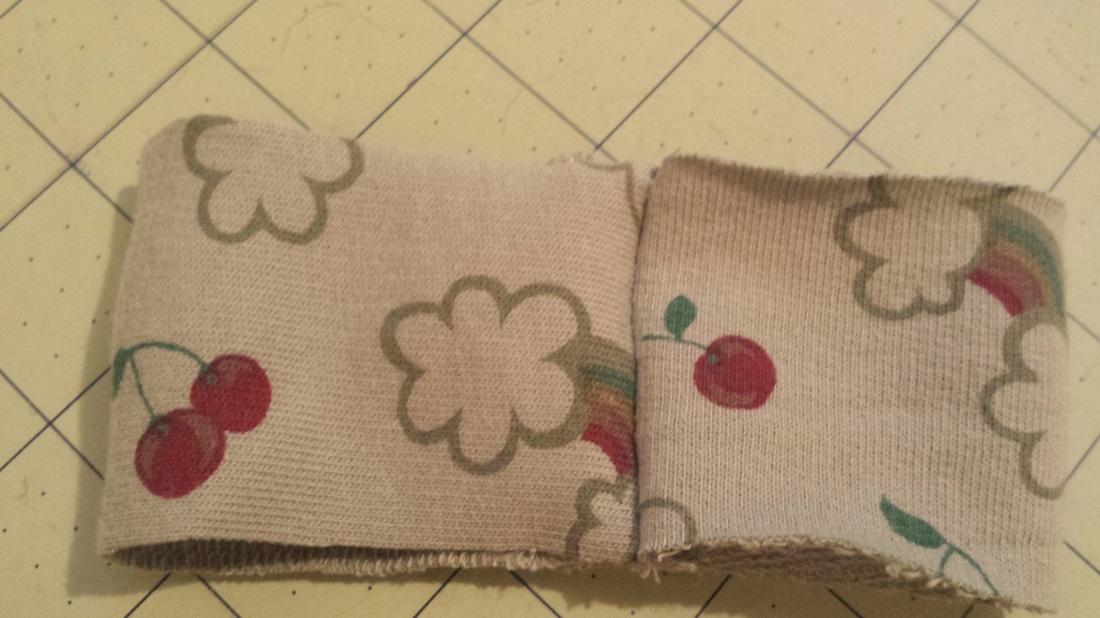
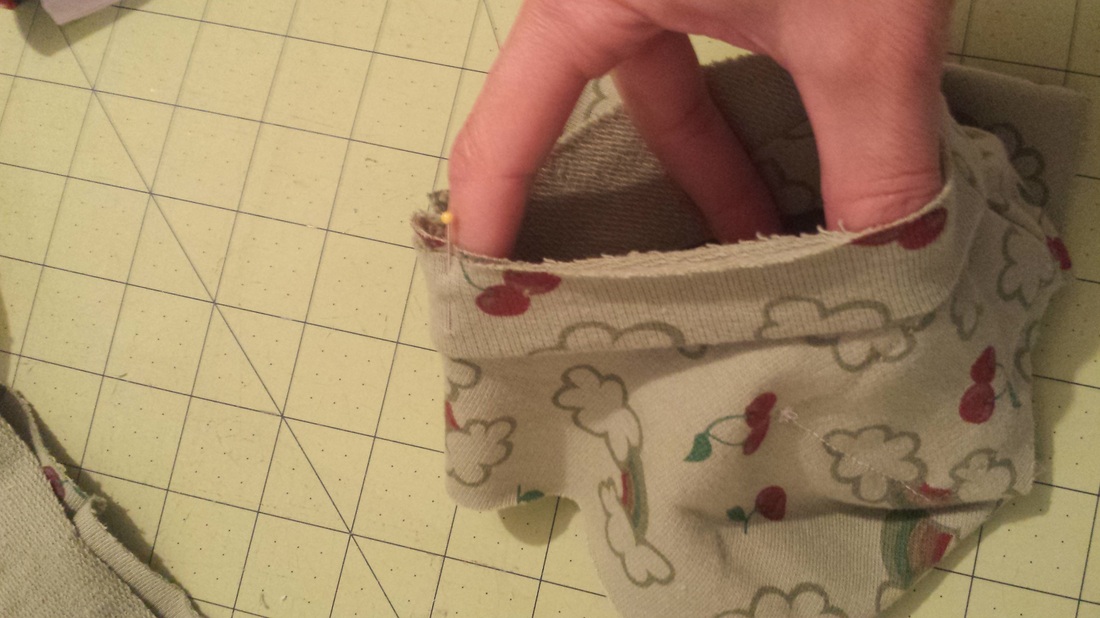
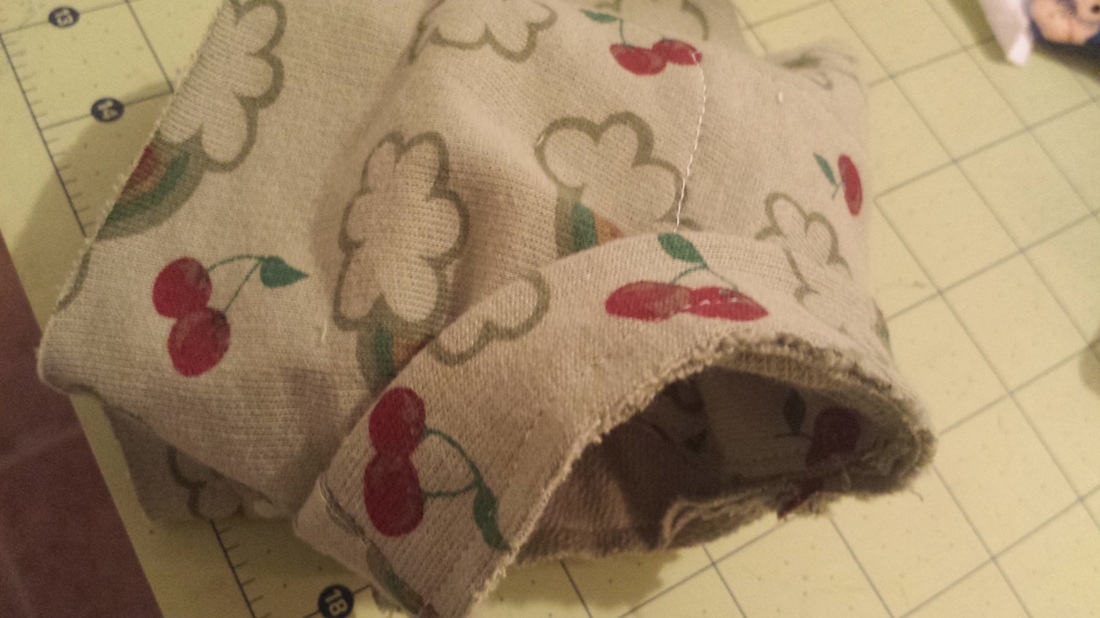
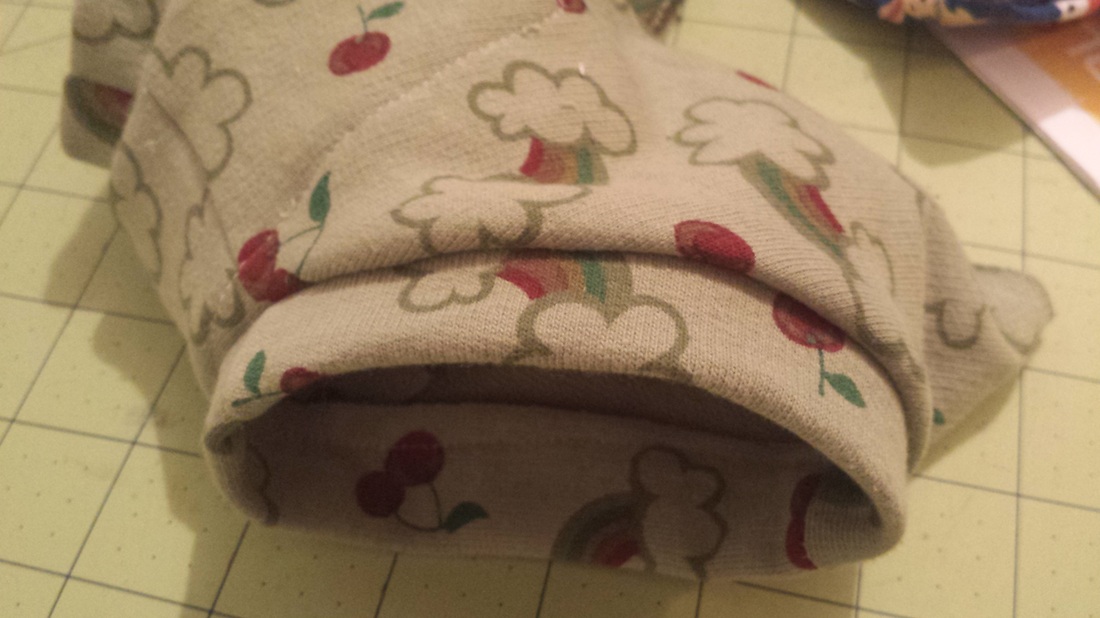
Next, take your leg band and fold it in half, right side (print side) facing out. Holding it open with your hand, stretch it over the leg opening of the underwear piece, which is right side out. Pin the leg band to the underwear piece, with all of the raw edges lying flat together. Sew along the edge, making sure to catch all three of the layers. When you turn it out, it should look like a cuff (see bottom photo). Repeat this with the other leg opening. You will do the same with the waistband. If you cut two shorter pieces, the steps will be identical to the leg bands, only you will obviously be sewing it to the top of the underwear. If you have one long piece, you will only need to fold it in half lengthwise and close the end with a seam. Sew it to the underwear in the same manner.  Oops! Soaker panel is a lot more crooked than I thought. Oh well! And that is it! You could topstitch around the waist and legs if you choose. If you do, make sure to use a long stitch length and looser tension so that your fabric won't pucker.
If you found this pattern/tutorial helpful, please pin, share and/or comment below. Thank you!
7 Comments
Over the weekend, my not-quite-two-year-old daughter has decided to potty train herself. I didn't intend for her to be done with diapers so soon (a little bit sad about that, a little scared), but she has been showing signs for quite a while now. She has been holding it for longer periods of time and waking up dry from naps, has been telling us when she has a wet or soiled diaper, and then started to tell us before she went. We had pulled the potty seat out of storage weeks ago, and it was sitting in the bathroom. She would sit on it, and put her toys on there to pretend, but there was no big push to have her actually go in it. A few days ago, she was bare-bottomed and told me that she had to poop. She was pretty distressed over it, as she has been lately. She knows she has to go and acts confused. When we were out of the house last week, she went in her diaper, but was upset about it. This time, she knew she didn't have a diaper, and was frantic. I told her to sit on her potty and she did, but nothing happened. She got up and started to play, and I left the room. A few minutes later, I noticed she was in the kitchen, playing, and she had gone into the potty all on her own! She didn't even bother to tell me - haha. So now she is in undies and I am hoping to keep her out of diapers. Tomorrow will be quite interesting, as I have to work and I'm hoping she does well with the sitter. She has been great, no major accidents, even when we went out to run errands this afternoon! Because I am too cheap to spend money on Disney Princess underwear and have loads of fabric at home, I decided to instead make some for her. I traced a pair of underwear that are a little large on her and after a couple of tries, finally perfected a nice pattern to make some elastic-less undies. Yes! They fit great, are soft and stretchy, but don't have any elastic and so are simple and quick to sew. If you would like the pattern and free tutorial, I have linked it at the bottom of this page. I am pretty happy with how they turned out! 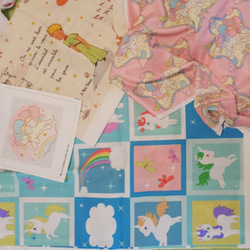 Spoonflower love! Spoonflower love! Spoonflower Mail!
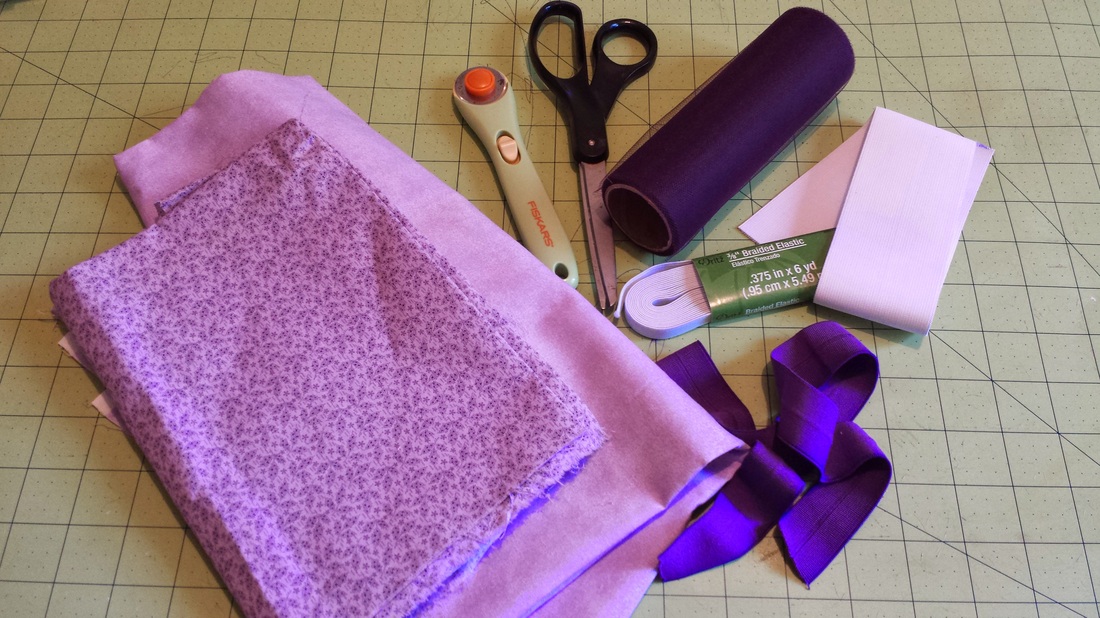
After we paid a bill and went to the library, we came home and she took a nap. I checked my mail and lo and behold! My Spoonflower order had arrived! From top left, clockwise: Le Petit Prince Little Twin Stars little unicorns cheater quilt Kiki and Lala (small wall decal) I am so excited!!! All of them are my designs, except for the unicorns. It is so adorable and perfect, and I plan to make a bedspread for my daughter when we we put together her toddler bed. I am a huge fan of The Little Prince and hold that story very near and dear to my heart. I am not sure yet what to make with this fabric, but I am thinking of a pillow for my son, and/or modpodge it to a canvas for wall art. I will make a separate blog post for their room design; I am planning a muted gender-neutral celestial theme with stars, moons and fanciful creatures that inspire the imagination and give you sweet dreams. I have always been a HUGE Sanrio fan, and one of my favorite Sanrio characters was Little Twin Stars (Kiki and Lala). Now that I have children, I want to share my love of vintage Sanrio, and LTS are perfect for this room theme! Not only is it brother and sister, but they ride a unicorn Pegasus, live in the clouds and fish dangling off of stars. Can it even GET more perfect than that? Since all of the vintage Kiki and Lala fabric prints are suuuuper expensive and imported, I made one for personal use on Spoonflower. I ordered one as a wall decal, for myself. It is only a 5" x 5" square, but it is a good quality sticker. I wanted it to decorate my laptop, and it fits perfectly! My only problem is that my laptop is black and glossy. I think I need to buy some white contact paper and then put the sticker over that so that it doesn't clash as badly. That will have to be a later project! My other Sanrio Little Twin Stars design was ordered in their new Performance Pique fabric. It has a great stretch and is lightweight. I am not yet sure what to make with it, but it feels as if it would make a great swimsuit for my girl, with maybe some ruffles...! It could also be a really cute dress or skirt. If you have an idea of what to make with it, I welcome your comments below. Babywearing FTW! After her nap, I dropped Big Brother at a friend's house. This made Little Sister very upset, as she is used to going wherever he goes and doing whatever he does. And she knew the friend's house, so that made her very sad. To make up for it, I threw her on my back (works like a charm, every time) and walked to the store for a lollipop. It was 90 degrees and in full sun the whole time, but she was happy and chattering to me the whole time, so it was a great time. I used a Double Hammock Rebozo carry; I attempted to do a candy cane chest belt but my wrap wasn't long enough (only a size 3). It still ended up being a lot more comfortable than the Jordan Back Carry that I usually do, which puts a lot of pressure on my shoulders. So, overall, it was a great day. If you would like a pattern for the undies that I made for little girl, check back on my site within the next few days, or subscribe to my blog for notification. I will be posting it here. They are designed for girls' underwear, but you could use them for a boy if you do not want a fly opening. If you do want a fly opening, a great pattern for boys' underwear, check out my Sewing section and click on Boys Clothing. Have you successfully potty trained a child under 2? If so, I welcome your advice and suggestions! And if you have any good ideas of what I could make with this brand new fabric, please comment below! If you have a link to a pattern, that would be even better! Thanks, and hope you have a great week ahead of you! 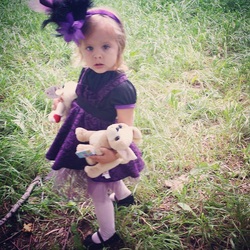 Here is my doll baby, my daughter Isla, going to her very first tea party. A friend hosted a Mad Hatter-themed afternoon tea and of course, I went overboard on her outfit (of course, I mean, really? An Alice themed tea party is just begging me to pull out all the stops). So naturally, that meant a fascinator and dress worthy of the Royal Wedding, and I scoff at the notion that any clothing store could EVER meet my high standards. Therefore, I marched straight into my local Joann Fabrics (after browsing some ideas on Pinterest) and grabbed up some supplies. An hour or so later, I finally had the complete outfit envisioned. I couldn't find the right fabric in the colors I wanted, so I picked a black and white damask and hand-dyed it at home using a packet of Dylon violet (also available at Joann's). After posting the completed outfit on one of my favorite Facebook groups, I decided to make the pattern and tutorial available, which meant making another one and actually taking pics and measurements this time. First of all, the pattern. Here is a link to the documents you will need to print out. At this time, I only have the pattern available in 24 months/2T size, but maybe I will one day figure out larger/smaller sizes. Link: The Mad Hatter Pinafore Pattern Not included in the link above is the pattern for a circle skirt. For that, you will need to follow the instructions posted below. Now, supplies. You will need:
 |
Meet & GreetHi! My name is Astrid and I am an unschooling, working mama of 3 with an intense need to design, craft and create. Follow me for ideas, tutorials, DIY projects, homeschooling resources and more. Archives
March 2017
Categories
All
|


 RSS Feed
